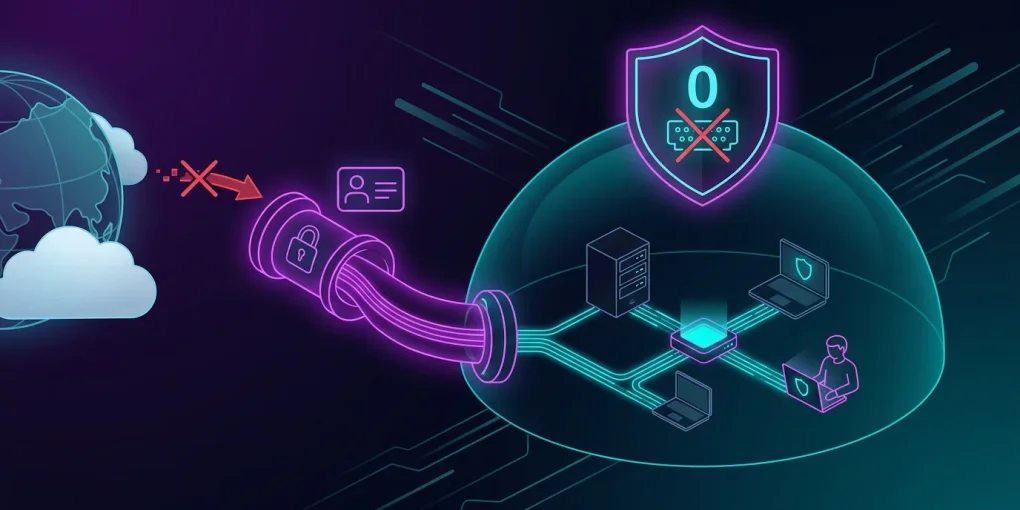
Zero Ports Open: Secure Your Home Lab with Cloudflare
There is a distinct milestone in every home lab enthusiast’s journey: the moment you realize you need to access your services from outside your home network. Whether it’s checking on a running Plex stream, managing a Docker stack via Portainer, or logging into your Proxmox VE dashboard on the go, the temptation to expose these interfaces to the wild web is incredibly strong.
For years, the standard prescription for this was straightforward: register a domain, configure a Dynamic DNS (DDNS) daemon to track your residential ISP’s rotating IP, configure a reverse proxy like Nginx or Traefik, and open ports 80 and 443 on your home router.
It worked. But it also kept me up at night.
In this post, we’re going to dissect why that traditional approach is a ticking time bomb for modern home networks, and how we can achieve a state of Zero Ports Open using Cloudflare Tunnels and Cloudflare Access.
The Anatomy of a Threat: Why Port Forwarding Must Die
To understand why we need to move away from port forwarding, we have to look at how threat actors map the internet. Tools like Shodan and Censys continuously scan the entire IPv4 address space. If you open port 443 and point a public DNS record to your home IP, you are essentially flashing your headlights in a dark alleyway.
Here are the primary risks associated with the traditional setup:
- IP Exposure: A simple
nslookup yourdomain.comyields your actual residential IP address. If an attacker wants to disrupt your home internet connection, they now have a direct target for a Distributed Denial of Service (DDoS) attack. - Exploitation of Reverse Proxy Vulnerabilities: Your reverse proxy (Nginx, Caddy, HAProxy) is now the front door. If a zero-day exploit emerges for that software, your entire host can be compromised.
- Internal Network Lateral Movement: Once an attacker gets past your gateway, they are inside your local area network (LAN). From there, they can scan for unprotected IoT devices, Samba shares, or unpatched machines.
The Cloudflare Tunnel Paradigm Shift
Cloudflare Tunnels (powered by the cloudflared daemon) completely reverse this dynamic.
Instead of opening a hole in your router’s firewall and waiting for incoming connections (Inbound), cloudflared establishes a persistent, secure, outbound-only connection to Cloudflare’s global edge network.
[ Your Home Server ] --- Outbound Connection ---> [ Cloudflare Edge ] <--- [ Public User ]
     (No Ports Open)                                   (Secured by WAF)
Because the connection is outbound-only, you do not need to open a single port on your router. Your home IP remains completely hidden behind Cloudflare’s massive network proxy. If someone tries to scan your public IP, they will find nothing but closed doors.
Layering Identity: Zero Trust at the Edge with Cloudflare Access
Securing the connection route with a tunnel is a massive step forward, but we aren’t done yet. If we map proxmox.christran.io directly to our internal Proxmox instance via a tunnel, the Proxmox login screen is still publicly accessible to anyone who guesses the URL. If a vulnerability exists in Proxmox’s authentication mechanism, your home lab is still at risk.
This is where Cloudflare Access shines.
Cloudflare Access acts as an identity-aware proxy at the edge. Before a single packet of traffic is ever routed down the tunnel to your home network, Cloudflare intercepts the request and demands authentication.
[ Request: proxmox.yourdomain.com ]
               |
      [ Cloudflare Edge ]
               |
     { Identity Check: MFA/SSO }  <--- User authenticates here
               |
         (Authenticated?)
         /             \
     [ Yes ]          [ No ]
       /                 \
[ Route Down Tunnel ]   [ Block Request ]
This means you can protect critical, sensitive admin panels—like Portainer, Proxmox, Home Assistant, or your router’s configuration page—with Enterprise-grade Single Sign-On (SSO) and Multi-Factor Authentication (MFA), completely free of charge for up to 50 users.
I have configured my setup to require a GitHub OAuth login, coupled with an explicit rule that only allows access to my specific email address. For an added layer of defense, you can even enforce hardware token checks (like YubiKeys) or geographically restrict access.
Practical Guide: Deploying cloudflared in Docker
Let’s translate theory into practice. We are going to deploy the cloudflared daemon inside a Docker container on your local network. This container will act as the connector bridge between your local services and Cloudflare.
Step 1: Create the Tunnel in Cloudflare Zero Trust
- Navigate to the Cloudflare Zero Trust Dashboard.
- Go to Access > Tunnels and click Create a Tunnel.
- Choose Cloudflare (Recommended) as the connector type.
- Name your tunnel (e.g.,
Home-Lab-Cluster) and save it. - You will be presented with a set of commands and a Tunnel Token. Copy this token; we will need it for our Docker Compose file.
Step 2: Write the Docker Compose Configuration
Create a directory on your Docker host and save the following configuration as docker-compose.yml. Replace YOUR_TUNNEL_TOKEN with the token you copied from the dashboard.
version: "3.8"

services:
  cloudflared:
    image: cloudflare/cloudflared:latest
    container_name: cloudflared
    restart: unless-stopped
    environment:
      - TUNNEL_TOKEN=YOUR_TUNNEL_TOKEN_HERE
    command: tunnel --no-autoupdate run
    security_opt:
      - no-new-privileges:true
Step 3: Start the Daemon
Spin up the container using the following command:
docker compose up -dCheck the logs to verify that the daemon has successfully established connections to Cloudflare’s edge servers:
docker logs cloudflaredYou should see output indicating that multiple connections have been established to various Cloudflare data centers. In the Zero Trust dashboard, your tunnel status should now show as Active.
Step 4: Route a Service and Apply Access Policies
Now that the tunnel is active, you can map public hostnames to local services directly from the Cloudflare UI:
- In the Tunnel settings, go to the Public Hostname tab.
- Click Add a public hostname.
- Input your subdomain (e.g.,
portainer.christran.io). - Set the Service Type to
HTTPorHTTPSand enter the local IP address and port of your service (e.g.,http://192.168.1.50:9000).
To protect this endpoint with Cloudflare Access:
- Navigate to Access > Applications in the Zero Trust sidebar.
- Click Add an Application and select Self-hosted.
- Name your application (e.g.,
Portainer) and input the exact domain you routed earlier (portainer.christran.io). - Configure your Identity Providers (e.g., Google, GitHub, or One-Time Pin).
- Define your Policies. For instance, create an “Allow” policy where the rule dictates that the email must equal
yourname@domain.com.
Save the application. Now, if you navigate to portainer.christran.io, you will be greeted by a secure Cloudflare login page rather than your Portainer instance.
Conclusion
Securing a home lab doesn’t have to mean compromising on accessibility. By migrating from traditional port forwarding to Cloudflare Tunnels, you eliminate your home network’s exposure to the public internet entirely. Layering Cloudflare Access on top provides enterprise-grade identity controls that keep your administrative consoles secure, even in the event of local service software vulnerabilities.
My home lab firewall rules are now simpler than ever: inbound traffic is completely blocked, and I can rest easy knowing that the front gate is guarded by one of the most robust Zero Trust networks on earth.